Astroで作ったサイトをGitHub Pagesにデプロイする
はじめに
Astro で作ったサイトを GitHub Pages にデプロイする方法について紹介します。
GitHub Pages を使うことで簡単に作ったサイトを公開することができます。
基本的には公式サイトのドキュメント通りにやればできるでしょう。
ここではカスタムドメインを使わないリポジトリ名が後ろにつくデプロイ方法を紹介します。
GitHub Pages 用に Astro の設定をする
astro.config.mjs にsiteとbaseオプションの設定を追加します。
import { defineConfig } from "astro/config";
export default defineConfig({
site: "https://<username>.github.io",
base: "<your-repo-name>",
});ここでsiteの username にはご自身の GitHub のユーザー名を、baseの your-repo-name にはデプロイするリポジトリ名入れてください。
GitHub Actions の設定
最後に GitHub Actions の設定をします。
プロジェクトのルートに.github/workflows/deploy.ymlを作成し以下の YAML を記述します。
name: Deploy to GitHub Pages
on:
# `main`ブランチにプッシュするたびにワークフローをトリガーします。
# 別のブランチを使用している場合は、`main`をそのブランチ名に置き換えてください。
push:
branches: [main]
# GitHub上のActionsタブからこのワークフローを手動で実行できます。
workflow_dispatch:
# このジョブがリポジトリをクローンし、ページデプロイメントを作成することを許可します。
permissions:
contents: read
pages: write
id-token: write
jobs:
build:
runs-on: ubuntu-latest
steps:
- name: Checkout your repository using git
uses: actions/checkout@v5
- name: Install, build, and upload your site
uses: withastro/action@v5
# with:
# path: . # リポジトリ内のAstroプロジェクトのルート位置です。(オプション)
# node-version: 24 # サイトのビルドに使用するNodeのバージョンです。デフォルトは22です。(オプション)
# package-manager: pnpm@latest # 依存関係のインストールとサイトのビルドに使用するNodeパッケージマネージャーです。ロックファイルに基づいて自動検出されます。(オプション)
# build-cmd: pnpm run build # サイトをビルドするためのコマンドです。デフォルトでパッケージのbuildスクリプトを実行します。(オプション)
# env:
# PUBLIC_POKEAPI: 'https://pokeapi.co/api/v2' # 変数の値にはシングルクォートを使用してください。(オプション)
deploy:
needs: build
runs-on: ubuntu-latest
environment:
name: github-pages
url: ${{ steps.deployment.outputs.page_url }}
steps:
- name: Deploy to GitHub Pages
id: deployment
uses: actions/deploy-pages@v4これでコードの設定は完了です。この内容で GitHub にプッシュすると、GitHub Actions が自動でデプロイしてくれます。
GitHub の Settings からページの設定をする
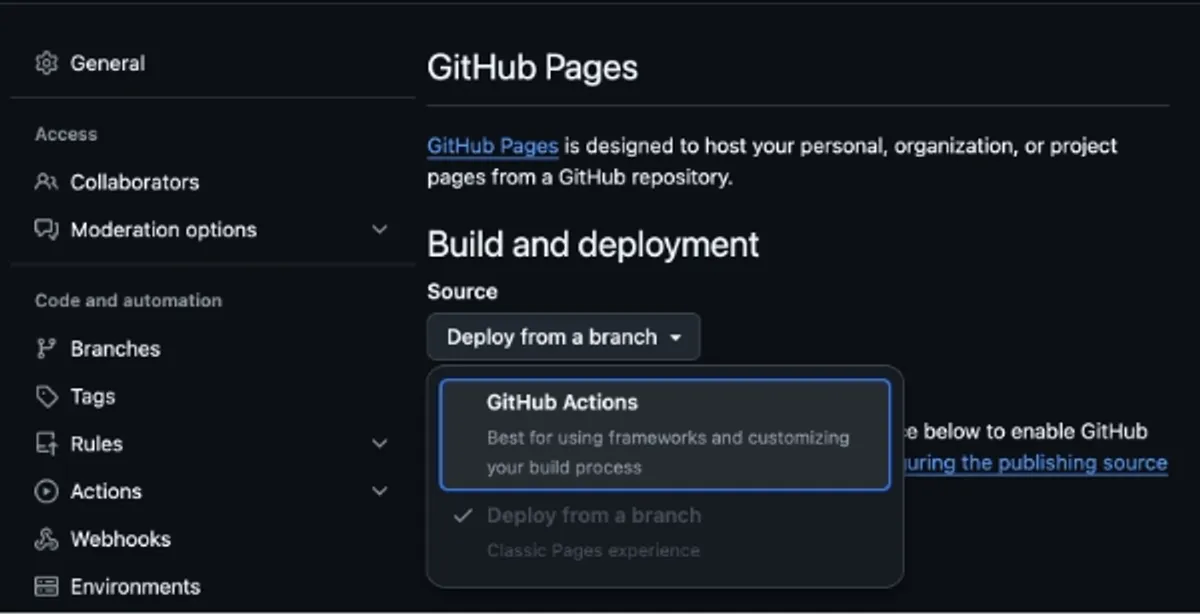
GitHub にプッシュしたら、リポジトリの Settings から Pages の設定をしましょう。
Build and deployment の Source を GitHub Actions に変更します。
以上でデプロイは完了です。
公開後の URL はhttps://<username>.github.io/<your-repo-name>/となります。
まとめ
Astro で作ったサイトを GitHub Pages にデプロイする方法について紹介しました。
Astro でも GitHub Pages を使うことで簡単に作ったサイトを公開できることが確認できたので今後も活用していきたいと思います!